Mistakes happen – you didn’t mean to delete a folder, but now it’s gone. Malware or ransomware could also have hidden or deleted your folders, forcing you to either pay or start anew. It could be also a local event, intentional or accidental, that led to the disappearance of your folder(s). In all of these cases, the consequence is the same, and forces you to rush to find a solution, and quick. Well, you came to the right place, since we’ll cover a few resolutions to your problem. Let us teach you how to recover a deleted folder in Windows 10.
5 Methods to recover a deleted folder in Windows 10
If you deleted a folder on Windows and want to recover it at some later time, there are several ways you can do it. From a simple recycle bin recovery to an advanced third-party software usage. These are the 5 methods to recover folders in Windows 10.
Method 1. Check your Recycle Bin
Although it might sound foolish, that’s where we would start, and where we recommend you do too. So many times we delete files but never go through with emptying the Recycle Bin. If that is the case, the matter is simple.
- Open Recycle Bin from your desktop or Start bar.
- Locate the folder and highlight it.
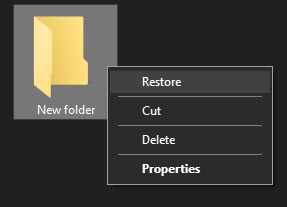
- Right-click and choose Restore. The file will be back to the file path it was deleted from. If you don’t remember it, it is possible to simply drag the file from the Recycle Bin to the desktop.
How to configure Recycle Bin to ask for delete confirmation
Here’s a quick tip to make sure deleting files by accident is a bit harder.
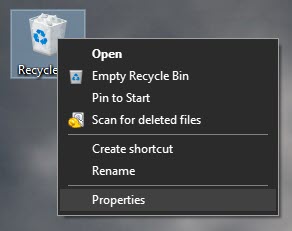
- Right-click on Recycle Bin on your desktop.
- Choose Properties.
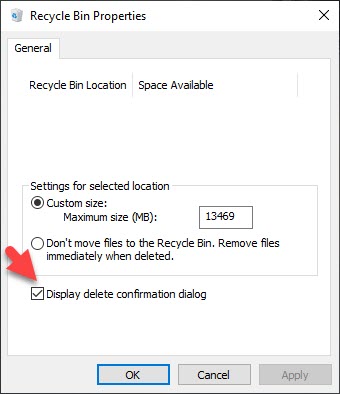
- Make sure the checkbox in front of Display delete confirmation dialog is ticked.
Method 2. Verify that the folder isn’t hidden
This isn’t as rare as you might think. Malware and ransomware often make your folder hidden and change your settings to make sure hidden files aren’t shown. This tricks you into thinking your files are gone forever. Here’s how to make sure that isn’t the case.
- Press the Windows key to open the Start tab.
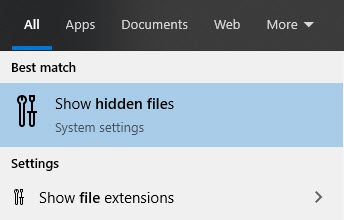
- Start typing ‘hidden files’ on your keyboard.
- An option Show hidden files will appear. Click on it.
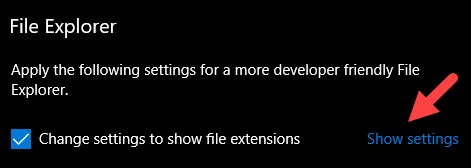
- Make sure the box in front of Change settings to show file extensions is checked.
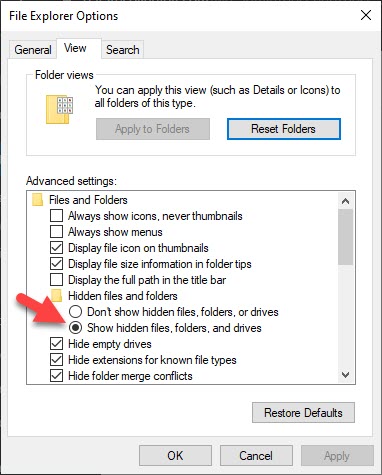
- Click Show Settings next to the option.
- Click the circle in front of Show hidden files, folders, and drives if it isn’t already.
- Go back to the location your folder used to be. If it was hidden, it should appear but will look greyed out.
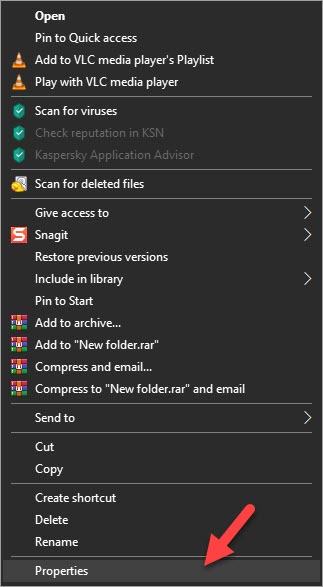
- Right-click on the folder.
- Click on Properties.
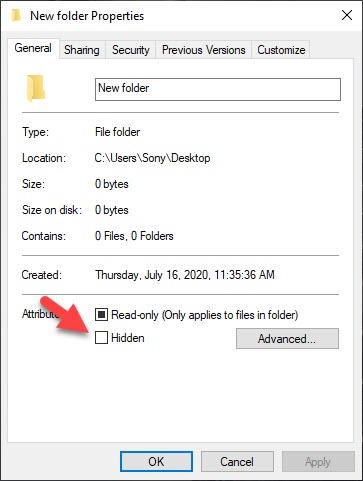
- Find a checkbox in front of Hidden. Make sure it is not ticked.
- Click OK.
Method 3. Restore folders from File History
This will be your first line of defense since it allows the restoration of a single folder.
- Press your Windows key.
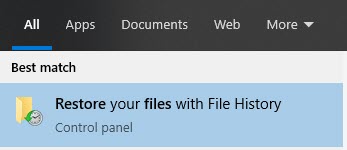
- Start typing ‘restore files’. Choose the Restore files with File History option.
- You’ll see a wide variety of folders. Highlight the folder(s) you want to restore, and click on the big green button at the bottom.
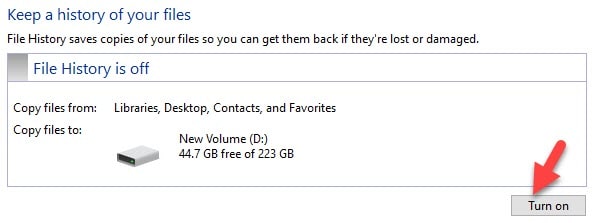
If File History was turned off, you’re out of luck.
- Click on Configure File History settings in the same window.
- Click the Turn on button. This will help prevent future data loss.
We know what you might be thinking – but I have System Restore enabled! Although it reverts Windows 10 files to a previous point, it only saves the state of installed software, system files, settings, and registry. It won’t be of much help when it comes to erased personal folders.
Method 4. Recover folder from a Windows 10 backup
This solution looks like bringing a machinegun to a swordfight, e.g. overkill. However, restoring an entire drive or partition from a backup can sometimes be less time-consuming than trying to restore a single folder. This is especially true if you didn’t delete it yourself, or the files got corrupted somehow.
How to create a Windows 10 backup (Shadow Copy)
- Press the Windows key.
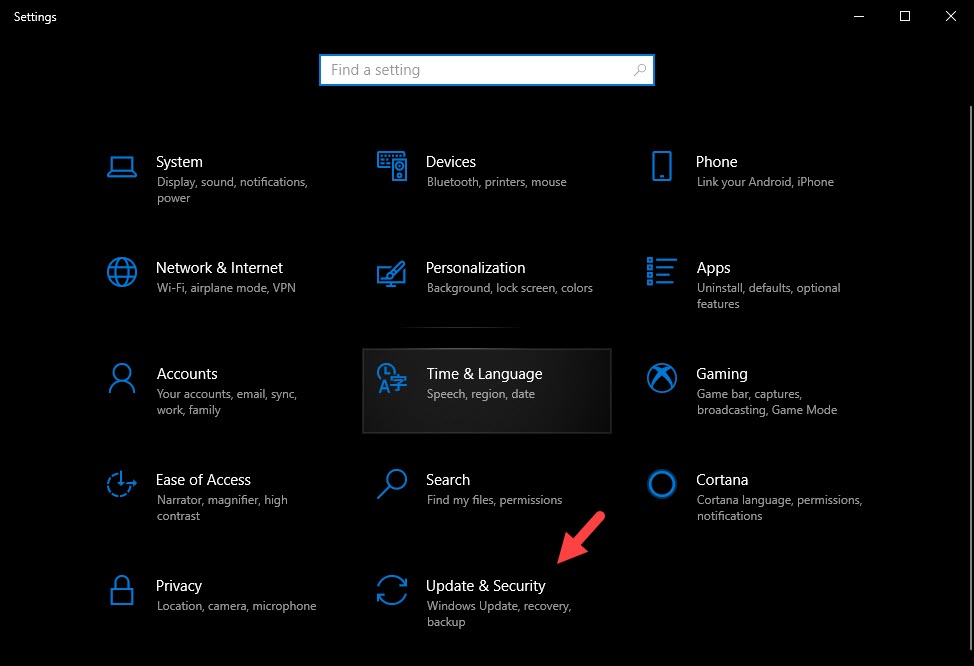
- Type Settings and choose that option.
- Navigate to Update & Security.
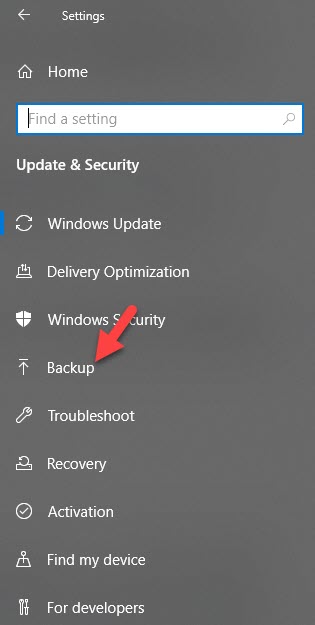
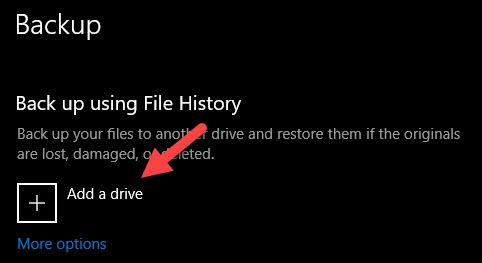
- Choose Backup from the list.
- Click on Add a drive.
- Plug in an external hard drive or a USB drive with a larger capacity.
- Once you choose that drive, the backup process starts. Microsoft implemented a Shadow Copy technology to the process. The files will be backed up in the background, and you don’t need to pause the work on your computer.
- Once the process is complete, click the arrow on the right side of your taskbar, next to the Network (Internet) icon.
- It will expand. Right-click on the icon that looks like a USB drive. Choose to Eject.
How to restore folders from a Windows 10 backup
- Plug your external HDD or the USB drive that contains your backup.
- You need a second USB drive or a DVD containing Windows 10 installation. We recommend the first option because the optical disc drive is rarely in use among Windows users. Plug it into the USB slot.
- Restart your computer.
- While the computer is starting, you need to enter BIOS by repeatedly pressing a key on your keyboard. The key is different based on your motherboard’s manufacturer, and you can see it on the welcome screen. It is typically F8, F9, DEL, or ESC.
- The BIOS itself is different based on the motherboard’s manufacturer as well. However, they all share the same option. Find Boot or Boot Priority.
- Rearrange drives so that the USB drive with the Windows 10 has the first boot priority. It doesn’t matter if the backup drive or the hard drive is second.
- Press the key that allows you to Save and Exit. It is typically F10.
- The computer will restart and enter a Windows Setup. Click Next.
- Choose the Repair your computer option in the bottom left corner of the window.
- Choose Troubleshoot.
- Click on System Image Recovery.
- Pick Windows 10 from the list.
- You are redirected to a Re-image your computer window.
- Choose to Use the latest available system image and click on Next.
- Alternative. This is the perfect time to format your hard drive if you weren’t satisfied with the size of partitions. You can recreate them to fit your needs better.
- Click Next, then Finish, then Confirm.
- Wait until the backup restoration process is finished. The computer should restart and then allow you to log back in.
Tip: if you are using some specific applications, you can follow their respective methods to recover the folders. For example, you can recover Outlook folders specifically.
Method 5. Using a Piriform Recuva to recover a folder
If you didn’t think ahead and created a backup, you’re in a precarious situation. In that case, trying data recovery software is your best bet. We picked one that is free, lightweight, and can restore an unlimited number of files, which is rare.
- Download Piriform Recuva.
- Install and launch the software.
- Choose the file type you want it to scan for in the top right corner, next to Options.
- If you need to, change the drive that will be scanned in the top left corner.
- Click on Scan.
- Preview the results. The ones that were successfully recovered will be marked with a green circle.
- Either check or highlight the files and folders you want to retrieve. Based on what you preferred, right-click and click on Recover Checked… or Recover Highlighted…
- Pick a location from your drive to save the files and folders.
Conclusion
Recovering folders on Windows 10 or any other version of Windows isn’t a difficult process. All you need is the right steps or tools to make it happen. We hope, you were able to get your folders back following one of the methods listed above. If the same thing happens on your Mac, you can follow our guide on recovering deleted folders on Mac.
