
Windows Defender was introduced as a built-in anti-virus utility starting with Windows XP. However, none of the versions before Windows 8 could find anything but spyware. This made third-party antivirus software a must. Windows 8 boosted its security potential by introducing anti-malware functionality and made scans more accurate by expanding its database of malicious files. With that said, since Microsoft no longer focuses on older versions of Windows. So, we suggest updating to Windows 10 from a security perspective. Now, let’s get into how to restore quarantined files by Windows Defender.
What is a Quarantined File?
A document or data file that has been identified as potentially harmful or infected with a virus has been placed in a secure and isolated environment known as quarantine. This file is generally referred to as a “Quarantined File”. This is a precautionary measure that comes with most antivirus tools to prevent any potential damage to the system or network until the file can be examined and either cleared or removed.
How to Restore quarantined files by Windows Defender on Windows 7
Here’s how the restoration process of files quarantined by Windows Defender on Windows 7 works:
- Click on the Start orb in the bottom left corner.
- Either search for “windows defender” or click on All programs to expand the list, then scroll down.
- Click on Windows Defender in the list.
- When it opens, click on Tools in the menu at the top.
- Now, click on Quarantined Items in the Tools section.
- Now, browse the list of items below Select an action to apply, and put a checkmark in front of items you want to restore.
- Once you’ve ticked desired files, click on the Restore button.

- Enter your administrator password if prompted, then click on Yes.
- Files are now back to their original location.
Recovery of files quarantined by Windows Defender on Windows 8/8.1
Things are pretty similar with Windows 8 and 8.1, as expected. Follow these steps to restore Windows Defender quarantined files on Windows 8:
- If you are using Metro, swipe from the right to left, then click on Search in the sidebar on the right. If you aren’t, open the Start menu.
- Do the same as steps 2 and 3 for Windows 7.
- When Windows Defender opens, switch over to the History tab.
- Click on the empty circle in front of the Quarantined Items option.
- Click on the View details button below.
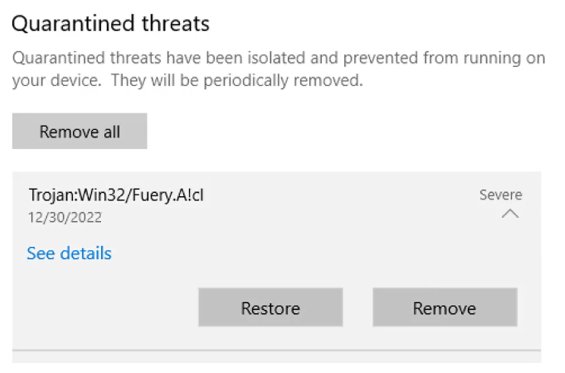
- Inspect the list of quarantined files, and tick the empty box in front of those you want to retrieve.
- Once done, click on the Restore button.
- Enter your administrator account password if requested, then confirm your decision.
- The files will be returned to the original file path.
Is the restoration process similar on Windows 10?
To a degree, yes. We dedicated an entire guide to restoring quarantined files in Windows 10. Additionally, methods 2, 3, and 4 in that guide should work with Windows 7, Windows 8, and Windows 8.1. That’s because the Quarantine file location didn’t change through the operating system upgrade. As a final note, we recommend you update to Windows 10 if you’re security-conscious.
How to whitelist a file from being quarantined by Windows Defender?
It could be frustrating if Windows Defender keeps falsely quarantining an important file you trust. In order to prevent it, you can simply whitelist the file. To whitelist a file from being quarantined by Windows Defender, you can follow these steps:
- Open Windows Defender Security Center by clicking on the shield icon in the taskbar or searching for it in the start menu.
- Click on “Virus & threat protection” in the left-hand menu.
- Under “Virus & threat protection settings,” click on “Manage settings.“
- Scroll down to the “Exclusions” section and click on “Add or remove exclusions.”
- Click on “Add an exclusion” and choose the type of exclusion you want to add (it could be a File, Folder, File type, or Process).
- Navigate to the file you want to whitelist and select it.
- Click “Open” to add the file to the exclusions list.
Once you’ve completed these steps, Windows Defender should no longer quarantine the file you’ve whitelisted.
Tip: If your file has been already deleted by Windows Defender, you can follow our guide on how to recover files deleted by Antivirus to get it back.
