
Windows Defender is an anti-malware component of every Microsoft operating system starting with Windows XP. It’s a built-in, convenient way to protect your files from being infected and your data from being stolen. Also, by reporting or encountering malicious files, you’re helping update Microsoft’s virus database. However, not all detected files are malicious and false positives are common. That’s why quarantine exists, allowing you to prevent a file from wreaking havoc but remain accessible if it turns out to be harmless. That’s our topic for the day. Here’s how to restore quarantined files in Windows 10.
Method 1. Restore quarantined files in Windows 10 via Protection History
We’ll start with the built-in functionality, and how Microsoft intended you to do it. Follow these steps to recover Windows 10 quarantined files using Protection History:
- Open the Start menu.
- Click on Settings (cogwheel icon in the left sidebar).
- Select Update & Security.
- Select Windows Security in the left sidebar.
- Click on Virus & threat protection.
- Click on Protection history under Current threats.
- Now, browse the list of All recent items.
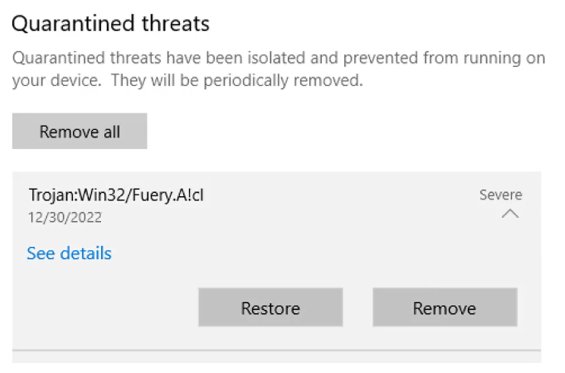
- Click on the file you want to restore.
- Select Restore, and the file will be returned to its original location.

- Tip. You can also click on See full history to see all quarantined files.
Method 2. Restoring quarantined files in Windows 10 via Command Prompt
The method above is convenient for restoring recent files. But what if there are multiple (or all) files that are quarantined, and you know they’re safe? Also, what about a file whose name you know, but are too lazy to scroll and search for? The following method to restore quarantined files in Windows 10 solves those problems:
- Open the Start menu and start typing “command prompt”.
- When Command Prompt gets highlighted, click on Run as administrator.
- Once the window opens, enter this before pressing Enter:
cd “%ProgramFiles%\Windows Defender”
Now, you can run one of the following commands:
- MpCmdRun.exe -restore -listall | List all quarantined files.
- MpCmdRun.exe -restore -all | Restore all quarantined files. Useful, but potentially
- dangerous.
- MpCmdRun.exe -restore -name “Filename” | Exchange Filename with the actual name of the file, including extensions, but without removing quotation marks.
- MpCmdRun.exe -restore -name virus-name | Use the detected virus name instead of the file name, for example, “MpCmdRun.exe -restore -name Trojan:Win32/Peals.F!cl)”
- MpCmdRun.exe -? or -h | displays all available options, including those for defining a file path for restoration, checking file paths that are excluded, etc.
Method 3. Access the Quarantine folder in Windows Explorer
The technique above works for most users. But there’s a decent portion that’s afraid of executing commands. To help that part of the Windows user base, we present a simple, beginner-friendly option. First, make sure you can see hidden files and folders. To do that, follow instructions in our Pen drive file recovery guide, specifically those under a headline titled Recovering hidden files using Windows File Explorer Options. Finished? Good. Open Windows Explorer, and paste this into the address bar:
C:\ProgramData\Microsoft\Windows Defender\Quarantine
You can now see all of the files in the quarantine, and drag-and-drop them individually or all at once.
Method 4. Windows 10 quarantined files recovery via third-party software
Whether you clicked on Remove instead of Restore in the first method or previously deleted them by accident, it’s a fact that quarantined files can go missing. No worries, though. We outlined a few methods to get them back in our “recover a deleted folder in Windows 10” guide. You can also use a Windows data recovery software of your choice, and input the scan to the file path mentioned above to save on time.
How to prevent Windows 10 from quarantining a file?
You might want to exclude a certain file or folder from being quarantined over and over. To prevent Windows 10 from quarantining such files, follow these steps –
- First, Open Windows Security:
- Click the Start button (Windows icon) in the lower-left corner.
- Type “Windows Security” and press Enter to open it.
- Go to Virus & Threat Protection:
- In Windows Security, click on Virus & Threat Protection.
- Access Exclusions:
- Under “Virus & threat protection settings,” click on Manage settings.
- Add an Exclusion:
- Scroll down to the “Exclusions” section and click Add or remove exclusions.
- Choose Exclusion Type:
- Click Add an exclusion.
- Pick the type of exclusion you want, like File or Folder.
- Select the File or Folder:
- Browse for the file or folder you want to exclude.
- Click Open to add it to the exclusion list.
- Confirm and Close:
- Check that the file or folder is listed as an exclusion.
- Finally, close the Windows Security app.
That’s it, from now on, the selected files and folders will not be quarantined by Windows security. You can exclude more files in the future. Just be sure that the file is safe to use and doesn’t contain any threats.
