
Recovering messages on Messenger can be a tricky process. Although Facebook is notorious for keeping tabs on its users, it also depends on whether the messages were deleted and how recently. To clarify, if you want to reminisce over old Messenger messages that weren’t erased, you have a good chance of doing so. The same goes for conversations you accidentally deleted not too long ago – think between 30 to 90 days. The success rate goes down with each passing day, so don’t waste another second. This is how to restore Messenger messages.
Method 1. Retrieving messages from an Archive
The best-case scenario is that you archived a conversation or group instead of deleting it. After all, they are next to each other in the list of options.
- Open the Messenger app on your Android or iOS.
- Since you can’t see the name of the person or group in the list of conversations, simply use the search bar.
- When their name pops up, tap on it.
- Send them a message, and the chat will be back to normal.
Method 2. Checking the cache folder on Android
- Connect your Android phone to your computer using a USB cable.
- In the root folder (internal storage or an SD card) find a folder titled Android.
- Open the folder named data.
- Go into the folder titled com.facebook.orca.
- Open the folder titled cache.
- look for a folder named fb_temp.
- Explore its contents for recent conversations.
Method 3. Using Facebook
Your Messenger is tied to your Facebook account, even if you deactivated the Facebook account itself. You can simply re-activate the account after logging in, and give it some time to catch up. Then, use the following method on a computer.
- Sign in to your Facebook account in your browser.
- In the top right corner, click on the down arrow.
- A drop-down menu appears. Select Settings & Privacy.
- Click on Settings.
- Select Your Facebook Information in the left-hand side menu.
- There are two options at your disposal now.
1. Online option
- Choose the Access Your Information option.
- Click on Messages.
- The tab will expand downward. Click on Your Messages.
- Find the conversation you’re trying to restore messages from.
- Browse through the most recent messages, and see if they’re still there.
2. Offline option
- Choose the Download Your Information option.
- A new tab opens up.
- Locate Data Range. Pick dates the messages were sent or received on the calendar. Leave it on All of my data if you want all conversations to be retrieved.
- As for Format, our recommendation goes for HTML instead of JSON.
- Media Quality is not as important in this case. If you need the messages back as soon as possible, choose Low. Otherwise, leave it on High.
- You’ll notice all options are selected. Click on the Deselect all option in the top right corner.
- In the far right corner, check empty boxes on things you want to download data about.
In our case, Messages only. - You are now ready to click on the Create File button.
- A report saying Your file is being processed will appear.
Depending on the options you selected, and the date range you chose, the process can take a few minutes or a few hours. - Once ready, you’ll get a Facebook notification stating: Your Facebook data is ready for download.
- Click on the notification pop-up window, then Download.
- A ZIP archive will be downloaded.
- Extract the ZIP archive to a location of your choice.
- In the base folder, find a file named index.html.
It might be titled index only if you chose to keep extensions hidden. - Double-click on the file and a new tab will open in your default browser.
If it doesn’t, you can open a new tab and then drag the file to it. - You will now see an almost identical screen as the Download Your Information one.
- Find the Messages headline and click on the Messages hyperlink under it.
- Choose the person/conversation you wanted to restore.
- To search for specific words, press Ctrl (Control) + F on your keyboard.
If you also lost your Facebook account, you can try recovering Facebook data.
Method 4. Using a third-party application on your computer
If the option above didn’t produce results, chances are that the data is deleted and ready to be overwritten. We recommend downloading data recovery software for Windows or for Mac. We’ll demonstrate the process with one of them because it has versions on both Android and iOS. Other apps should be nearly identical. Keep in mind, rooting is required if you didn’t find anything in the fb_temp folder using Method 2.
- Download EaseUS Mobi Saver for Android by clicking on Free Download.
- Connect your phone using the USB cable.
- You’ll have to enable USB debugging if it isn’t turned on already
For Android 4.2 and newer, open Settings > About phone (or System then About phone) > Tap on Build number several times repeatedly (between 7 and 10) > You’ll get a notification stating: You’re a developer. > Go a step back and instead of About phone, choose Developer options that now appeared > Scroll down and enable USB debugging. - Install and run the program.
- You’ll see the name of your phone at the top of the page.
- Click on Start.
- If your phone has been rooted, the analysis of the data will start.
If not, you’ll be shown a link to an in-depth guide on how to root your phone. - They will be sorted under Messages option in the menu on the left.
- You can browse through the messages in the middle section.
- Put a checkmark in front of those you want to recover.
- Click on Recover in the bottom right corner.
Method 5. Install a third-party app on your smart device
If you don’t have computer access or don’t want to connect your phone, simply use a data recovery software for Android or iOS. Once again, rooting/jailbreaking will most likely be required. There are far too many apps for us to successfully demonstrate a universal step-by-step guide. Some aren’t updated regularly, other don’t support Messenger at all. Do a little research of your own, rely on the screenshots, and take it one step at a time.
Method 6. Recovering Messenger Messages from Server Backups
In addition to the methods mentioned earlier, another potential avenue for message recovery is through Facebook’s server backups. Facebook maintains regular backups of user data, including Messenger conversations, as a precautionary measure against accidental deletion or message loss. Although direct access to server backups is typically not available to users, it is worth considering as an option for message recovery.
To explore the possibility of recovering Messenger messages from server backups, follow these steps:
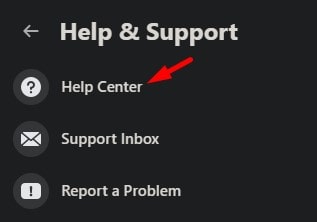
- Visit the “Facebook Help Center” or reach out to “Facebook Support” for assistance in accessing server backups specifically for Messenger messages.
- Provide the support team with relevant details, such as the approximate date range or specific conversation you wish to restore. Your chances of a successful recovery are increased if you supply information that is precise and detailed.
- Facebook’s support team will review your request and determine if the desired messages are available in the server backups. They have the necessary tools and resources to access and retrieve data from these backups.
- If the requested messages are found in the backups, the support team will guide you through the restoration process and help bring the messages back to your Messenger account.
- Be aware that the process of retrieving messages from server backups may require some time and patience. The support staff will work hard to recover and restore the communications, but the precise timetable will depend on factors such as the volume of requests and the complexity of the recovery procedure.
It is important to note that the availability and feasibility of accessing server backups for Messenger messages are subject to Facebook’s policies and technical capabilities. It is suggested that you contact Facebook directly through their official support channels to acquire the most accurate and up-to-date information about server backups and message recovery.
By considering the option of server backups and reaching out to Facebook for assistance, you may have an additional opportunity to recover Messenger messages that were not retrievable through the methods covered earlier.
